

We’re saving you time and money.
“We wanted to create a place for superintendents to be close to their work, a quiet place to make telephone calls, use a computer, pull-up drawings, and recharge power tools.”
- President, Mike Hardin
Let’s get down to the nitty gritty
-

Build to Provide...
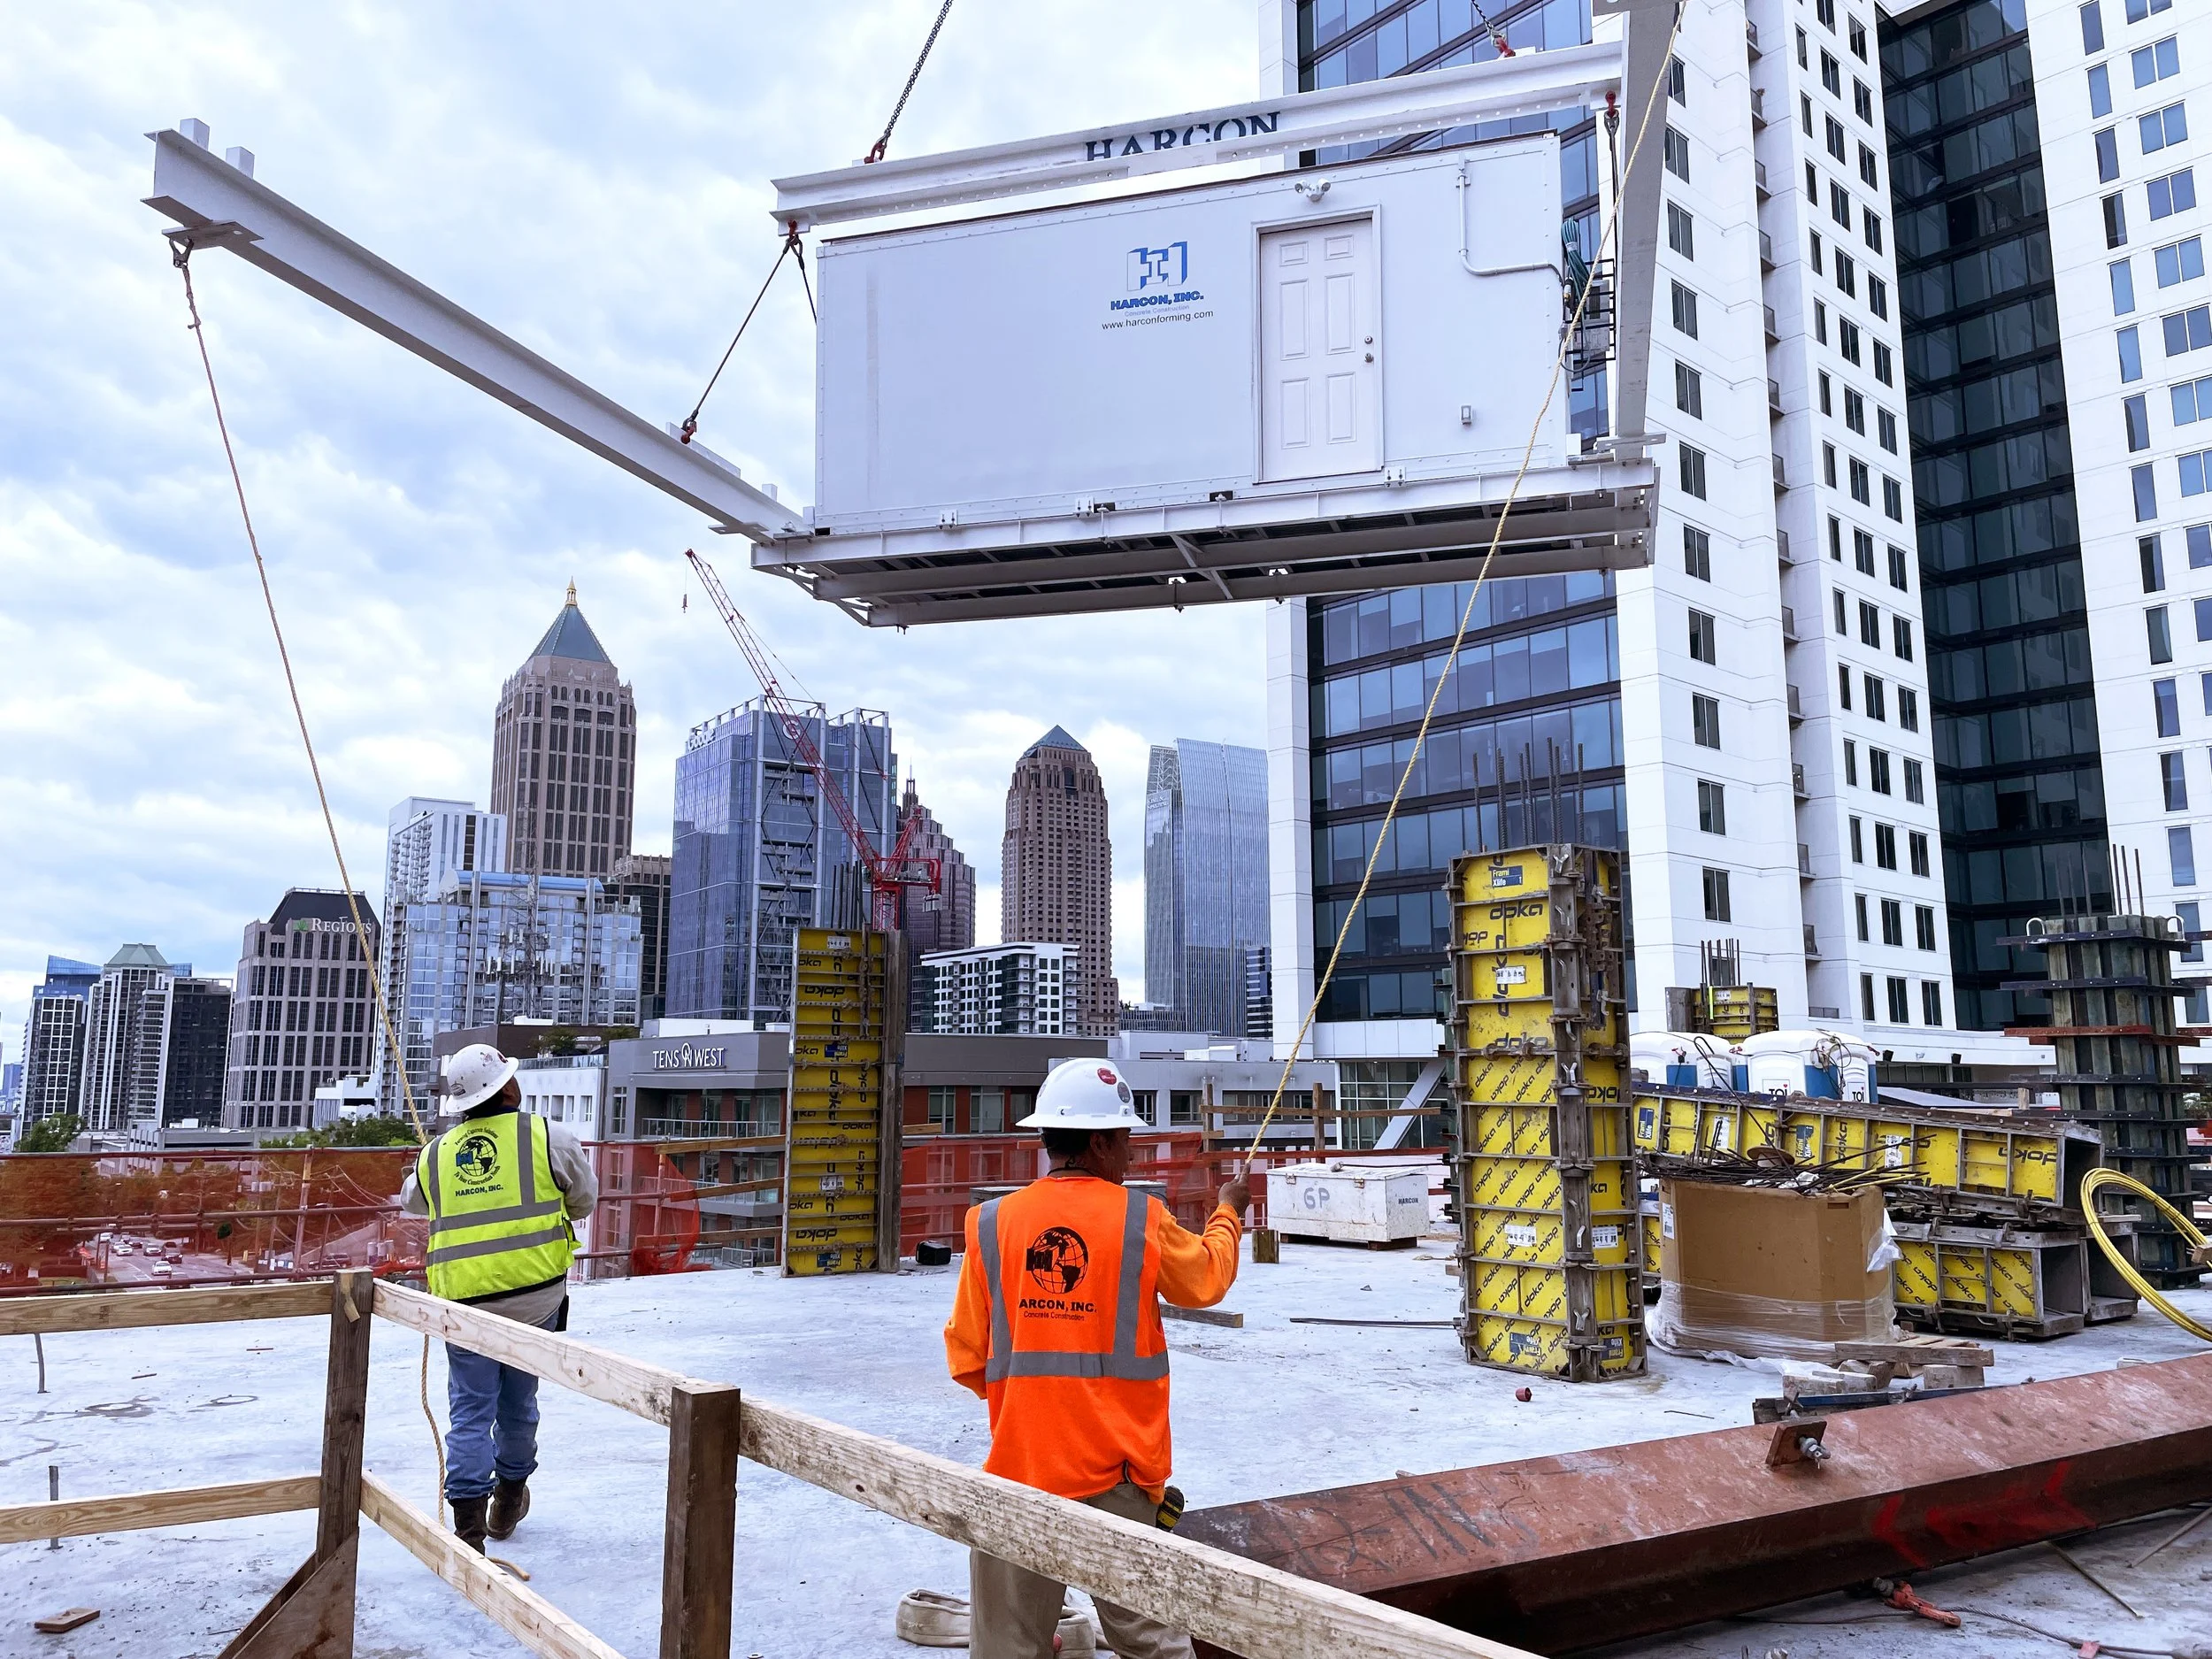
…an office or small warehouse attached to the side of a high-rise building. It is designed for the construction trades management personnel to be more productive by having their office or stored materials close to where they are working near the highest level of where construction is taking place.
-

Product Objective
On typical high-rise buildings that are constructed in dense urban areas, the project has very limited site storage area. Temporary offices are usually either rented nearby or built on site in the way of future construction or not on the level where the subcontractors’ work is taking place. The SkyPodz increase the productivity of the manager by locating them close to where their employees are, and the work is taking place. It is flexible as to where it can be located on the building.
-

Design Overview
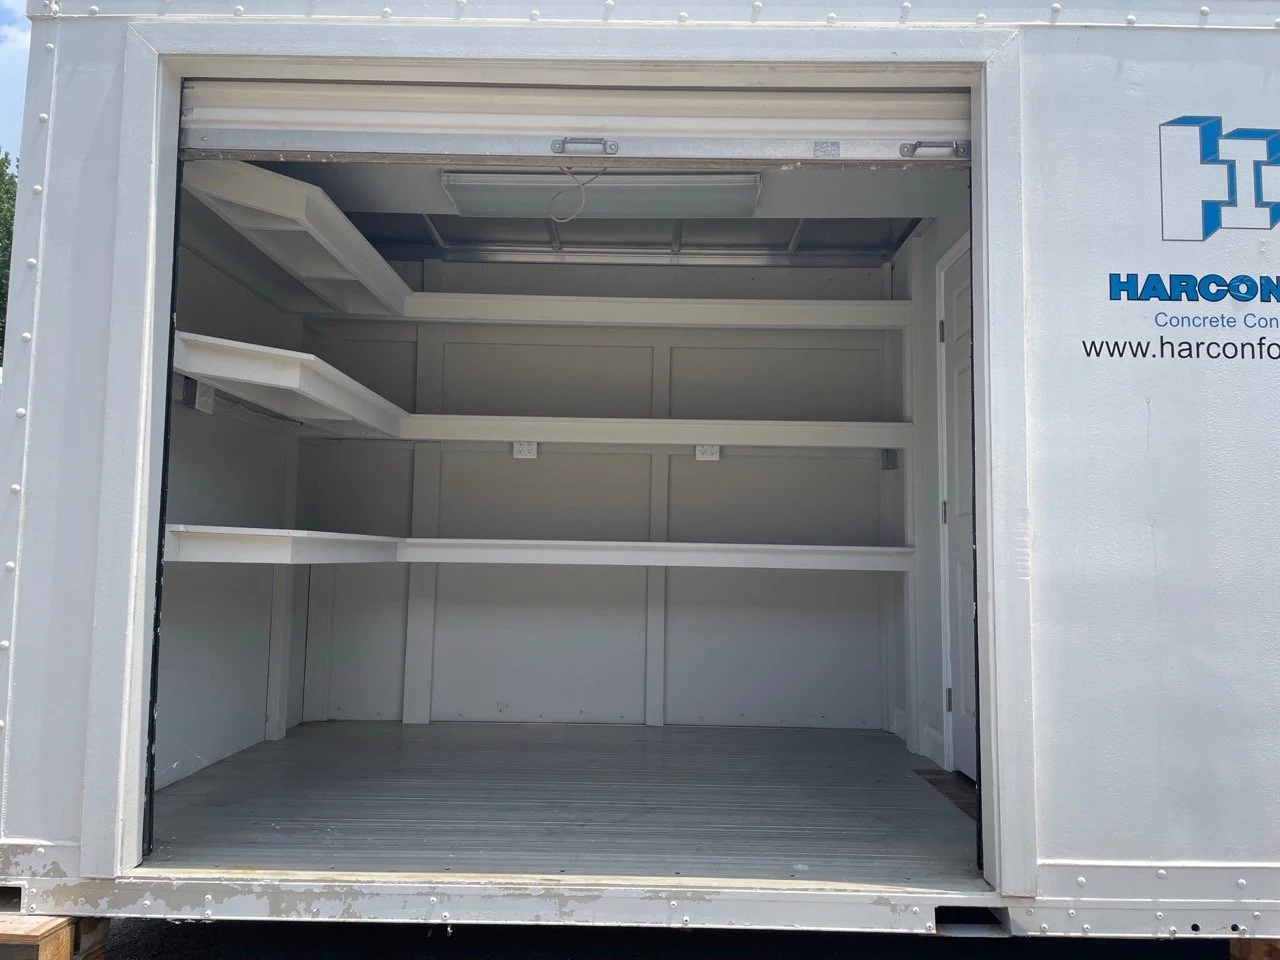
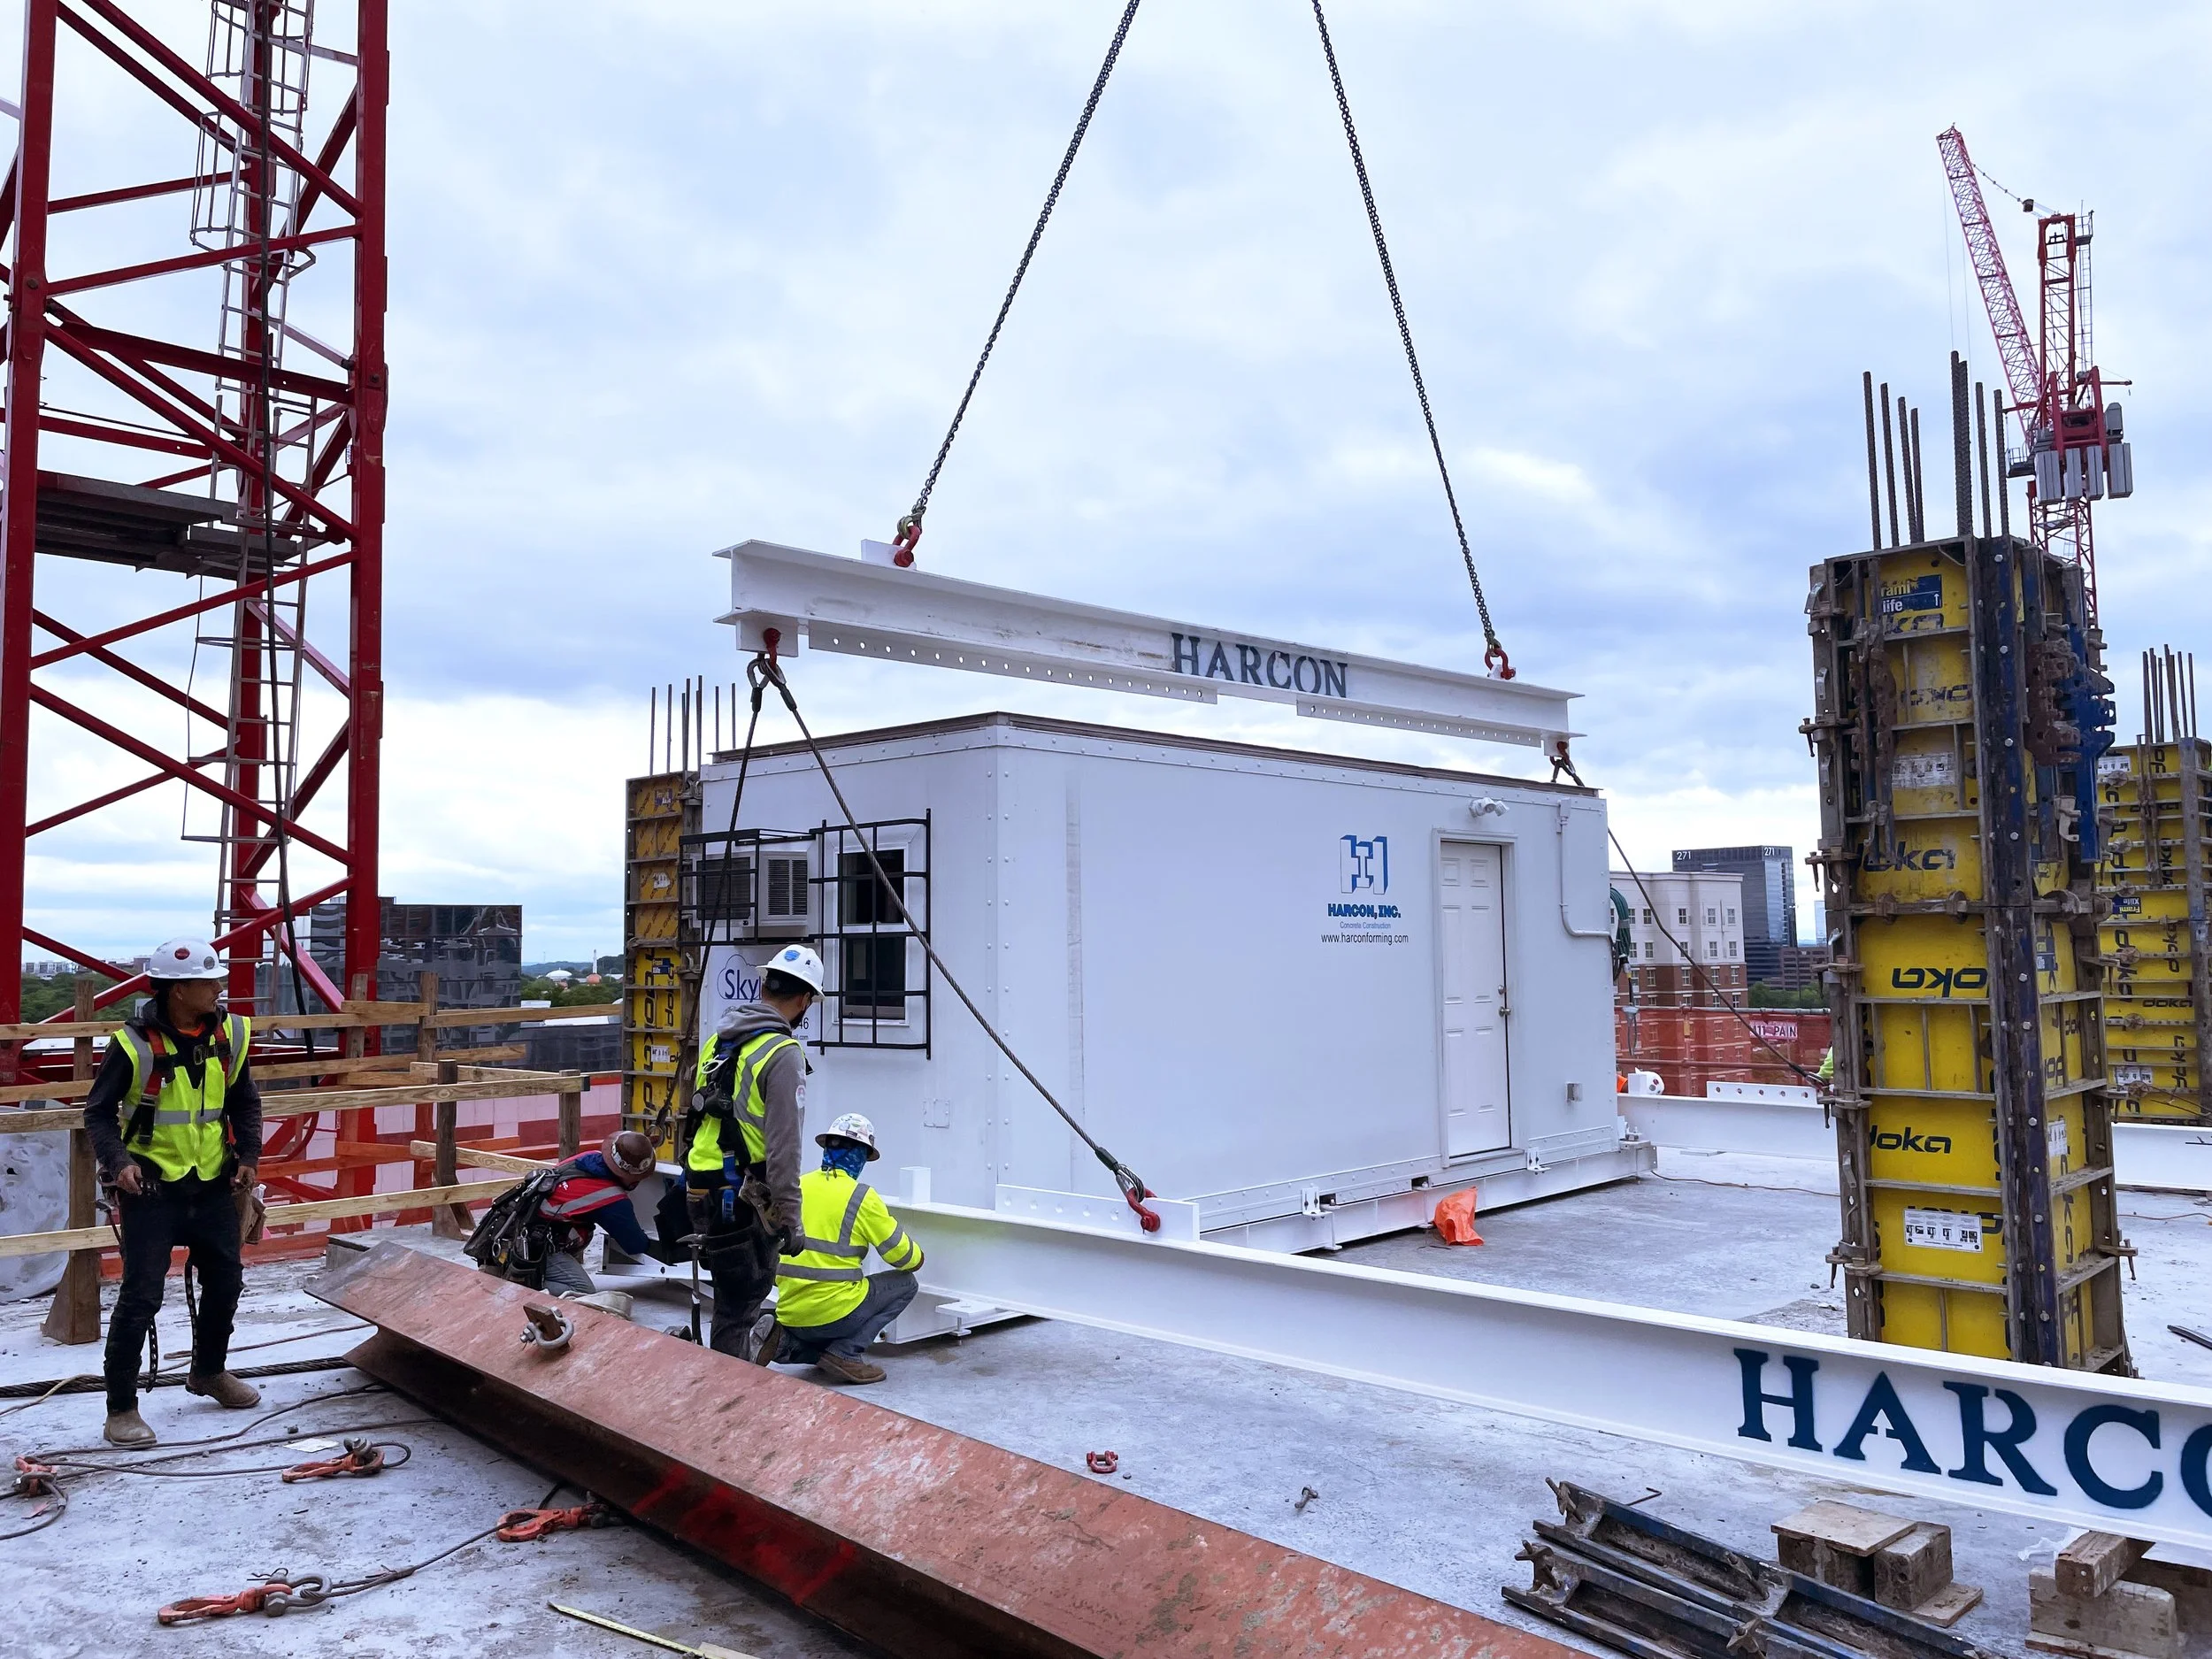
SkyPodz are lightweight containers that have been modified and attached to an outrigger so that they can be hoisted by a tower crane to continually higher levels as construction progresses. They have power to operate lights, HVAC, mounted computer monitors, refrigerators, and charging stations for tools. They include shelves, desks, plan racks and tables, and a rollup door for larger tool storage.
-

Ideal User & Use
For subcontractor trades that have work on multiple floors, the SkyPodz can be modified to be a storage area for the items they need for each floor. The SkyPodz can be stocked at their yard, shipped to the project, and hoisted to the outrigger to supply them with the material they need on that floor. They can also be used as a small second elevated office if a main office is needed on a lower level.


High-rise construction projects in urban areas often have limited site storage. Temporary offices are usually rented or built on-site but are rarely on the same floor where the work is taking place. After working in the construction industry for over 40 years, Mike Hardin – president of SkyPodz – developed the SkyPod: a way to increase the productivity of any high-rise construction project by allowing site managers and superintendents to remain closer to their work.
A SkyPod is a lightweight, temporary office structure capable of being hoisted by crane and mounted to any floor during construction. Providing an enclosed office space, storage and power source for any trade, a SkyPod saves the effort and labor hours of employees traveling to and from the mobile office on the ground.
Made of an aluminum 20-ft. modified lightweight container, a SkyPod is mounted to an underslung steel beam assembly with outrigger beams that protrude inside the building. These outrigger beams are then temporarily secured to the floor. It can be detached and jumped to higher levels as construction progresses on the high-rise. Layout configuration can be adjusted based on needs and wants.
Amenities can Include:
Operating lights
Climate controlled with HVAC
Mounted computer monitors
Shelving, a desk, plan/drawing racks, and tables
Filing cabinet
Refrigerator and microwave unit
Circuit breakers for temporary power connections
Charging station for tools
Storage area with rollup door for larger tools
Large signage area to display company logo


The Procedure
SkyPodz Pre-Shipment Procedure
Review crane chart capacities and total weight for placement location.
Establish an assembly area with the contractor (the full assembled size is 20’x29’).
Create a job specific elevation view to show where the SkyPod will be installed.
A quick way is to use the building section drawing.
Create a floor specific plan view to dimension the anchor sleeve locations from column lines.
Submit the above along with drawings OR-1 & OR-2, and SkyPodz brochure to the contractor and request for approval by EOR.
Make any adjustments necessary pursuant to EOR’s review.
Review shipping routes for low overpass areas.
Verify PVC anchor sleeves, bolts, nuts, and washers are loaded into the SkyPod.
Verify the anchor sleeves are cast and located in the slab per plan.
SkyPodz Shipment Procedure
Load 8’x20’ SkyPod on front of trailer, then load W8x13 support beam underslung assembly behind the SkyPod.
Load (2ea) W14x30 x29’ Outrigger beams and then the W12x65 x 24’ Lifting Beam on top of the underslung assembly already on the truck.
This way the W12x65 lifting beam will be able to be unloaded first to pick up the outrigger beams, then the underslung assembly, and finally the Skypodz.
Skypodz Installation Procedure
Before the SkyPod is flown into position:
Install the reshores as shown on sheet OR-1.
Reshores are installed for 2 floors below each W14x30 outrigger beam at the edge of the slab (see sheet OR-1).
Pre-Stage (2ea) extension ladders, (8ea) wing nuts and plate washers on the floor below the Skypodz designated location (the first reshore floor).
Pre-Stage (8ea) ½” diameter coil rods wing nuts and plate washers, (2ea) hand come-alongs anchored to columns, and (4ea) shores on the floor of the Skypodz designated location.
Hook up the W12X65 lifting beam with the crane with all cables attached.
Unload the W14x30 outrigger beams with the lifting beam and place outrigger beams on level surface at more than 25’ OC.
Unload the underslung assembly using the lifting beam and set it in between the outrigger beams.
Lift and bolt each W14x30 outrigger beam onto the top side of each underslung assembly
Lift the SkyPod and attach to the underslung assembly.
Add tag lines to the interior side of W14x30 outrigger beams.
Install guardrails at each end of SkyPod.
Lift the SkyPod with W14x30 outrigger beams installed using W12x65 lifting beam only a couple of feet and check for level.
Adjust the interior lifting points along the W14x30 outrigger beams until it is level.
Install two retractable lifelines to the two interior columns where the SkyPod will be installed.
Remove the temporary guardrails at the edge of the slab.
Lift the SkyPod to the designated location.
The 2 come-alongs might be needed to pull the SkyPod into the building.
Install the (8ea) ½” coil bolts without nuts on underside.
Install (4ea) shores at the interior end of W14x30 outrigger beams.
Install ½” coil nuts and washers top and bottom tight.
Check all shores and reshores are in place.
Check all nuts and washer are in place.
Unhook the interior pick points from W14x30 outrigger beams.
Unhook the exterior pick points from W14x30 outrigger beams.
Install temporary guardrails to each side of the SkyPod.
Install plywood toe boards between SkyPod and edge of slab.
When cycling floor to floor reverse the operations.

About Mike Hardin
SkyPodz is the brainchild of Mike Hardin, member of the American Society of Concrete Contractors, past Chairman of the Board of the Associated Builders and Contractors of Georgia, and President of Harcon Inc. – a concrete formwork subcontractor of 33 years specializing in commercial and industrial projects of all sizes headquartered in Buford, Georgia, with offices in Nashville, New Orleans, Birmingham, and Greensboro, North Carolina. Hardin has provided Productivity Seminars to over 200 contractors, universities, Lean Construction organizations, and as a featured speaker on Productivity and Creativity.